


Streamline Your Drapery Design Consultation Workflow
- Woven Dwelling
- 2 days ago
- 8 min read
TL;DR:
A structured workflow ensures custom window treatments meet functional and aesthetic goals.
Proper preparation, including precise measurements and clear goals, optimizes the consultation process.
Expert pattern recognition and education during consultation lead to better, more personalized results.
Window treatments have a quiet power to shape a room’s entire mood, yet poorly planned drapery decisions remain one of the most common and costly home decor mistakes homeowners and designers face. Fabric choices, measurement errors, and mismatched styles can result in drapes that simply do not work, visually or functionally. A structured drapery design consultation workflow changes that equation entirely. Whether you are a homeowner refreshing a living space or an interior designer managing multiple projects, following a clear, proven process ensures your custom window treatments deliver on every front: light control, privacy, insulation, and lasting visual appeal.
Table of Contents
Key Takeaways
Point | Details |
Precision matters | Measuring windows to 1/8 inch is critical for flawless custom drapery fit. |
Layering boosts performance | Combining light and heavy fabrics with interlining adds insulation and style depth. |
Workflow prevents errors | A clear consultation workflow reduces costly mistakes at every project stage. |
Expert help pays off | Professional guidance reveals options and ensures lasting beauty and function. |
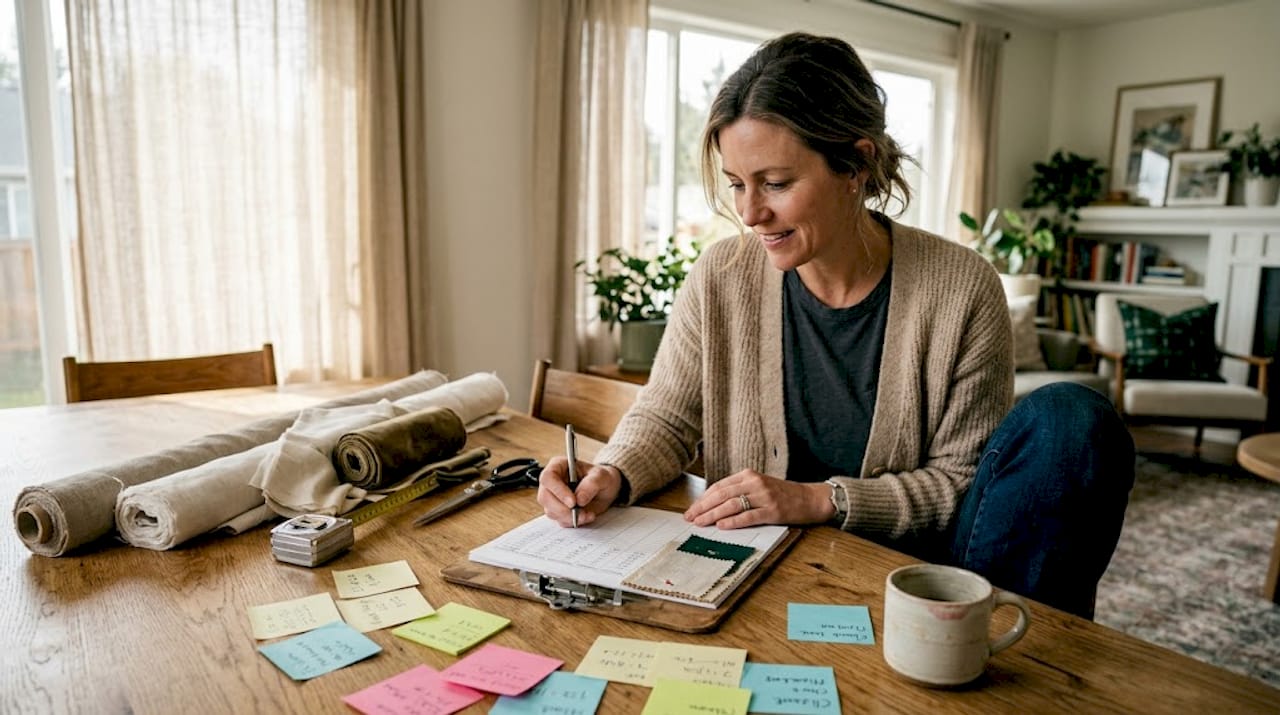
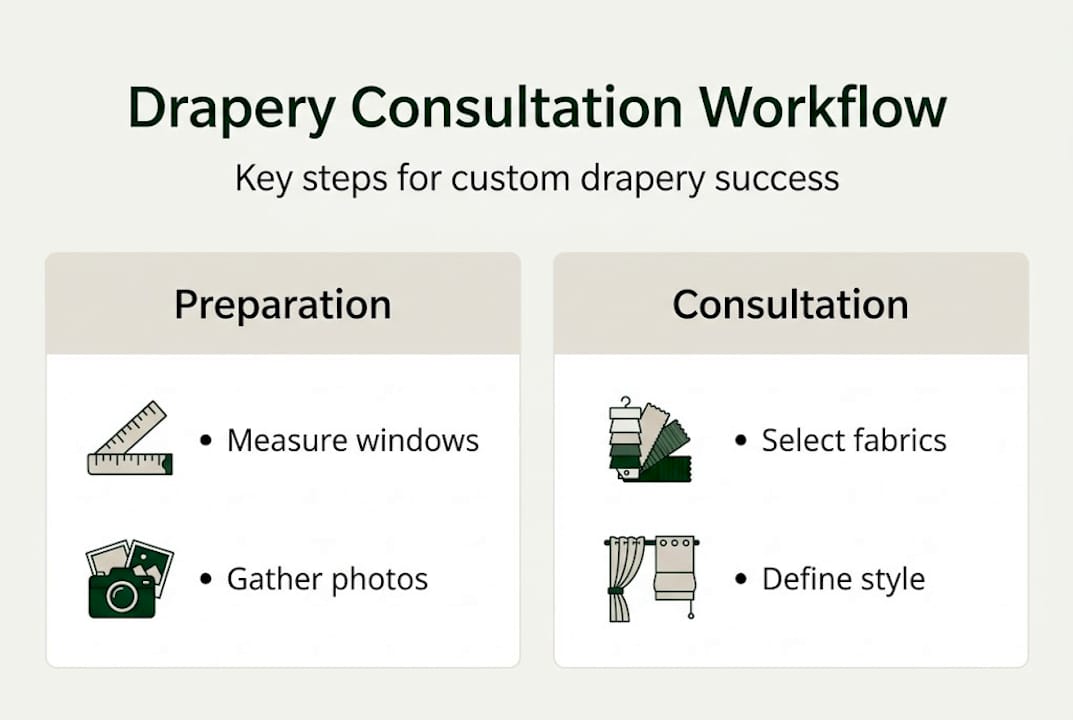
What to prepare before your consultation
Now that you understand why a great workflow matters, start by gathering the right information before your consultation. Walking into a drapery design consultation underprepared is like choosing paint colors without seeing the room. The more detail you bring, the more focused and productive your session will be.
Here is what to collect in advance:
Window measurements (width and height for every window you plan to treat)
Room photos taken in natural light from multiple angles
Inspiration images from design magazines, Pinterest boards, or saved screenshots
Goals including your priorities for light control, privacy, thermal comfort, and style
Budget range with a realistic ceiling and preferred timeline
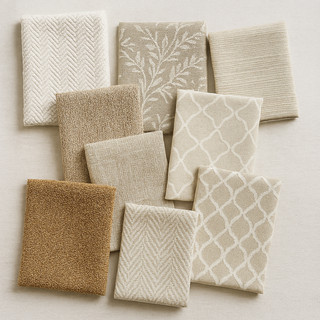
Existing furniture and wall color swatches or photos for color matching
Understanding the custom drapery process basics before your appointment also helps you ask sharper questions and avoid scope surprises.
Pro Tip: Measure to 1/8 inch precision for optimal drapery fit. Even a small error compounds across multiple panels and can result in ill-fitting results that require costly remakes.
Prep item | Recommended detail level | Why it matters |
Window measurements | Width and height to 1/8 inch | Ensures accurate panel sizing |
Room photos | 3 to 5 images in natural light | Shows real color and proportion |
Inspiration images | 5 to 10 reference images | Aligns style expectations |
Budget and timeline | Firm range with flexibility | Prevents scope creep |
Fabric color swatches | Paint chips or fabric samples | Ensures cohesive color palette |
Coming in with realistic expectations about lead times is equally important. Custom drapery often requires 6 to 8 weeks from consultation to installation, and accounting for that window prevents last-minute frustration.
Step-by-step drapery design consultation workflow
Once you are prepared, follow this clear workflow to ensure every detail is managed from first conversation to final install.
Initial consultation – Discuss goals, preferences, room conditions, and budget with your designer.
On-site measuring – Take precise measurements of every window, noting architectural details like trim depth and ceiling height.
Style and hardware selection – Choose heading styles (pinch pleat, ripple fold, grommet) and matching rods, rings, and finials.
Fabric sampling – Review fabric samples in the actual room under real lighting conditions.
Estimate and proposal – Receive a detailed written quote covering fabric, labor, hardware, and installation.
Order confirmation – Approve final selections, sign off on measurements, and authorize production.
Installation scheduling – Coordinate delivery and hanging with your workroom or installer.
Asking about custom workroom timelines at step five helps you plan around realistic production windows. You can also review the full step-by-step custom workflow for a deeper look at each phase.
Pro Tip: Interlining not only adds body and weight to your drapes but also significantly boosts insulation, making it an ideal choice for rooms with large windows or harsh seasonal climates.
Style | Fullness ratio | Insulation value | Flexibility |
Pinch pleat | 2.5:1 fullness for insulation | High | Lower |
Ripple fold | 1.8:1 to 2:1 | Moderate | High |
Grommet | 1.5:1 to 2:1 | Moderate | Moderate |
The comparison above makes it clear that each heading style carries real trade-offs. Selecting the right one depends on your specific goals for aesthetics, energy performance, and operational ease.
Selecting fabrics and drapery styles that deliver
After mapping out the workflow steps, focus on the elements that shape your ultimate result: fabric and style choices. These decisions directly affect how your window treatments look, feel, and perform over time.
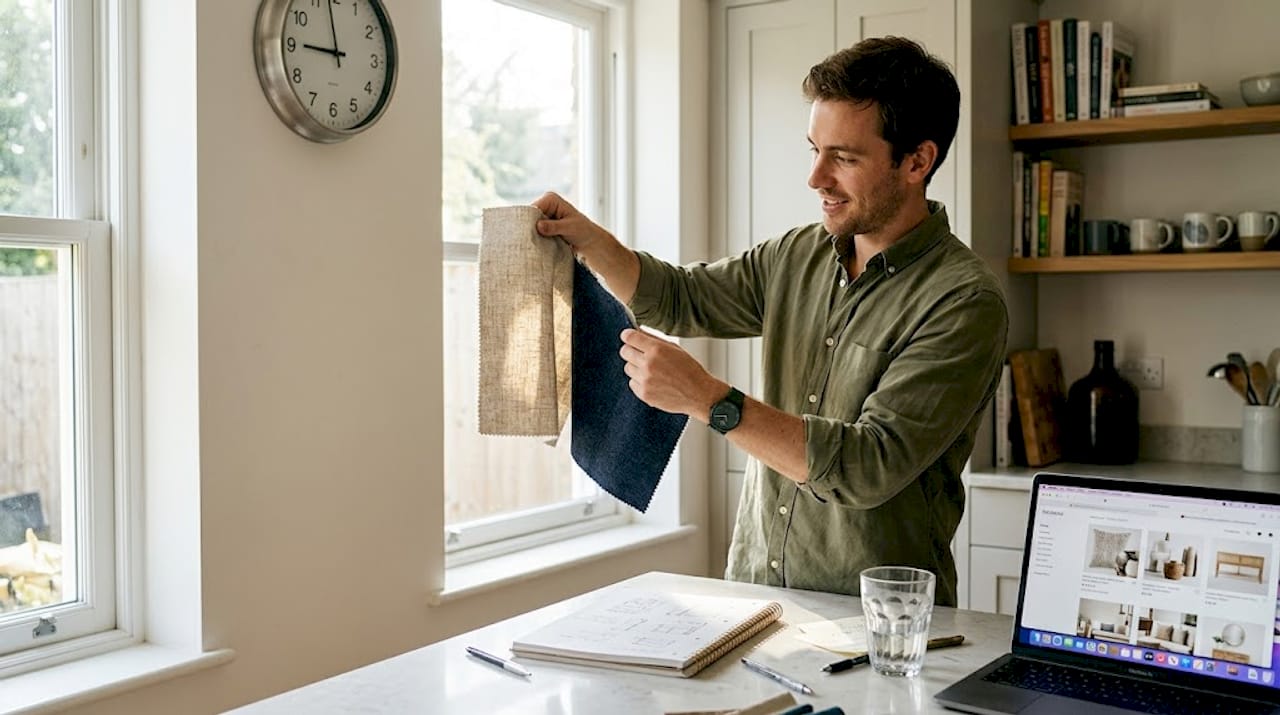
Fabric weight and weave are your starting points. Lighter sheers allow soft, diffused light while heavier wovens, such as jacquard or cotton canvas, provide strong light block and sound dampening. Interlining, a layer stitched between the face fabric and lining, adds body, warmth, and longevity. The result is a drapery panel that hangs beautifully and insulates effectively.
Key style options and their trade-offs:
Pinch pleat – Classic and formal; excellent fullness and insulation; less adaptable to track systems
Ripple fold – Clean, modern look; travels smoothly on ceiling tracks; slightly lower fullness
Grommet – Casual and contemporary; easy to operate; works best with medium-weight fabrics
Rod pocket – Traditional charm; limited operability; best for stationary side panels
Using a 1:3 texture and weight ratio for layering, such as a light sheer inner panel paired with a heavy drape, adds visual depth and improves both light management and insulation. This layering approach is one of the most effective design moves a consultant can recommend.
Reviewing a detailed fabric selection guide and a curtain style selection resource can help you narrow choices before your consultation, saving time and sharpening your decisions during the appointment.
Fullness ratios also matter more than most homeowners realize. A 2.5-to-1 ratio means your fabric is two and a half times the width of the rod, creating that lush, gathered look associated with high-end drapery. Lower ratios produce a leaner, more contemporary silhouette.
Common mistakes and how to avoid them
Even a perfect workflow can be derailed by common mistakes. Here is what to watch for and how to stay on track.
Measuring errors – Imprecise measurements lead to panels that are too short, too narrow, or awkwardly proportioned. Measuring to 1/8 inch precision is critical for a custom fit.
Wrong fullness ratio – Choosing a fullness that is too low produces flat, underwhelming drapery. Always confirm the fullness ratio in your proposal.
Ignoring interlining – Skipping interlining saves a small amount upfront but reduces the drape’s body, insulation, and lifespan.
Style and fabric mismatch – Pairing a structured heading style like pinch pleat with a lightweight, drapey fabric results in panels that do not hold their shape.
Overlooking hardware – Rods, brackets, and rings must be rated for the weight of your panels. Undersized hardware causes sagging and long-term damage.
“A 1/8-inch mistake can lead to costly remakes. Precision is paramount.”
For each of these pitfalls, the solution is straightforward: ask your consultant direct questions during the proposal review phase. Confirm measurements, fullness ratios, fabric weights, and hardware ratings before signing off. Reviewing drapery fabric insulation tips can also help you understand how material choices affect both comfort and energy costs.
Once your drapes are installed, a reliable drapery care guide helps you protect that investment and extend the life of your panels significantly.
How to verify and enjoy flawless results
After installation, take these straightforward steps to confirm stunning, functional results that last.
Start by inspecting alignment. Each panel should hang plumb, with hems sitting consistently above or just at floor level. Check that fullness is evenly distributed across the rod and that pleats or folds are uniform and consistent. Hardware should feel secure, with no wobble in brackets or rings.
Functional checks matter just as much:
Opening and closing – Panels should glide smoothly without catching or binding
Light seal – When closed, panels should block or filter light as intended
Sound dampening – In rooms where acoustic comfort was a goal, the difference should be immediately noticeable
Visual proportion – Step back and assess whether the panels make the window look taller, wider, or more architecturally significant
Color accuracy – Fabric color should align with how it appeared during your sample review in natural light
Interlining increases drapery durability and insulation value, so panels with interlining should feel noticeably weightier and more structured than unlined options. If anything looks off after installation, contact your workroom promptly. Most quality fabricators will address fit issues quickly when caught early.
For ongoing care, follow a consistent drapery maintenance tips routine, which includes gentle vacuuming, prompt attention to stains, and periodic professional cleaning for heavier fabrics.
What most guides miss about drapery design consultation workflows
With all the practical steps covered, here is the deeper reality of what separates a good consultation from a truly outstanding one.
Most guides treat consultation workflows as a checklist. In practice, the best consultations are less about linear steps and more about expert pattern recognition. A seasoned consultant reads the room in ways a form or checklist never can: the quality of natural light at different times of day, how a family actually uses a space, whether the client’s stated preference aligns with their lifestyle.
The real skill lies in hearing what clients never say directly. A homeowner who mentions “privacy” might actually be describing anxiety about street-level visibility. A designer requesting “drama” may need guidance on balancing boldness with livability.
Education is just as important as execution in a high-quality consultation. When a consultant explains why a particular fullness ratio or interlining choice matters, it builds trust and helps clients make genuinely informed decisions. The outcome is not just well-fitted drapery. It is a home that feels more considered, more intentional, and more comfortable. The pro drapery consultation impact on a finished space extends far beyond the windows themselves.
Get expert results with Beautiful Windows Elgin
Ready to put this workflow into action? Connect with professionals who streamline every step, from initial measurements to final installation.
Beautiful Windows Elgin provides both local and nationwide customers with access to an extensive selection of designer fabrics, personalized design consultations, and custom drapery services. Whether you need guidance on heading styles, fabric weight, or interlining options, the team is equipped to help you achieve refined, functional results. For projects that demand quality materials, explore the designer canvas fabric collection and request samples to review in your own space before committing to a final selection.
Frequently asked questions
What should I bring to a drapery design consultation?
Bring precise window measurements, room photos, inspiration images, and a clear list of your goals for privacy, light, and style. Measuring to 1/8 inch ensures your consultant can work with accurate data from the first meeting.
How long do custom drapery projects typically take?
Custom drapery projects usually require 6 to 8 weeks from consultation to installation, depending on fabric availability and workroom capacity.
Is pinch pleat better than ripple fold for insulation?
Pinch pleat offers 2.5:1 fullness for superior insulation and a classic look, but ripple fold provides more flexibility and a cleaner modern profile.
Why is interlining recommended for custom drapes?
Interlining boosts durability and insulation, giving drapery a premium weight, richer appearance, and longer useful life compared to unlined panels.
Recommended

Comments